I was talking to one of my friends about how I’ve been restoring tools and cast iron pans lately, so I made a short video of what my current electrolysis tank looks like. Afterwards, I realized I should write up my current setup for other woodworkers, tool collectors, and pan nerds.
What is Electrolysis?
From Wikipedia:
Electrolysis is the passing of a direct electric current through an ionic substance that is either molten or dissolved in a suitable solvent, producing chemical reactions at the electrodes and a separation of the materials.
In practical terms: a simple, easy, and affordable way to remove rust from garage sale finds.
Materials
- Manual car/boat/motorcycle battery charger. I picked an old NAPA one
from OfferUp for $15, but you can spend a little more for a new one
and not deal with people on the internet. What you need is a charger
that does not have “automatic” or “smart” in the description. When
you plug it in, you should get a charge immediately.
Note: If you see an old one with rusty positive/negative clamps, you can replace them easily with a pair of wire strippers and a $5 set of alligator clips from O’Reilly, NAPA, AutoZone, etc.
- Anodes: Rebar or steel of some kind. I use a few 12-18” precut rebar depending on the size of your tank (~$0.60/piece). These get destroyed in the process, so it is a good idea to have extras on hand. DO NOT use stainless steel for it can produce small amounts of hexavalent chromium, which is toxic and illegal.
- A bucket/tank of some kind. You can use an aquarium tank, a 2- or 5-gallon bucket, or a horse trough. Do not expect to use this for anything else again though, as it will be quite stained with rust. I started with a 2 gallon bucket, but the saw blades I wanted to de-rust were too large, so I switched to an 18” paint roller bucket I had in the basement. Not long after making the switch, I needed to restore a huge cast iron wok, so I needed a larger tank. Fortunately, I found a guy selling horse feeders for $1 at a garage sale.
- Steel fencing wire to link the anodes together. You’ll also use this
to suspend your tool in the tank too. Buy this in the fencing
department of your home center for <$10 for a long spool.
Note: Some people use insulated electrical wire, copper, and wire nuts to link rebar together, but it’s a pain to change out in my experience.
- Electrolyte: Washing soda, AKA dishwasher detergent. Only use soaps with sodium carbonate (not bicarbonate – baking soda) in them. I pay ~$2 at my grocery store.
- Water. Just fill your tank with your garden hose.
- Cutting pliers for cutting the fence wire
- Slip-joint or needle nose pliers for twisting the fence wire (fencing pliers would also work, but I don’t have any).
- A multimeter is useful if you have to verify the setup, but it is not required.
Setup
- Find a location with good ventilation, preferably outside and near a power outlet. Ensure it is safe from children, pets, and wildlife. Electrolysis releases hydrogen into the air, which is flammable, so do not do this indoors.
- Install the rebar. You want the rebar to have “line of sight” with
the object you’re de-rusting. For example, if you have a rectangular
tank, put one piece of rebar in each corner of the tank. You will
then suspend your tool in the middle of the tank. If you have a round
tank, put all the rebar on one half (as close to the sidewalls as
possible) to make your life easier.
Because I de-rust objects of variable sizes, I attach my rebar to a set of broken BMX handlebars that I can shift in the tank as needed.
- Fill the tank with enough water to cover your rusty object.
- Add washing soda. A rule of thumb is 1 Tbsp per gallon, but more won’t hurt (or help). Just pour some in.
- Suspend your tool in the tank with wire. If you cannot cover the
entire tool with water, you can always flip it around and de-rust in
a second pass. DO NOT let the tool touch the rebar.
If you have a scrap piece of wood, you can make a hook with wire and hang your tool that way.
- Connect the positive clamp to one of your rebar pieces.
- Connect the negative clamp to the wire on your tool.
- Turn on your battery charger.
- You should see bubbles forming around your tool. If you do not, check
the gauge on the battery charger. I normally run my charger at 12V
and hit around 6 Amps. The amperage decreases as your piece becomes
less rusty.
If you have a multimeter, check each piece of rebar. If your charge is good, you may need to add some more sodium carbonate before you start seeing bubbles.
- Check back in awhile. I’ve found it takes 12 h for light rust, but on heavily rusted hand planes, it is often 48 h. The great thing about electrolysis is it’s self-regulating, so if you leave a tool in the tank for a few extra days, it won’t be harmed, unlike with vinegar.
- Remove the tool and scrub the rust away with an abrasive sponge or Scotch Brite pad.
- If it’s a tool, polish, dry, and apply some sort of protectant like 3-in-1 Oil or Autosol. If it’s a cast iron pan, wash and season. I never did anything with my chemistry degree, so I’m not sure why some tools and pans seem to be prone to “flash” rusting, but I’ve learned to be fast with the scrubbing to protecting phases.
Disposal
If you’re restoring tools and pans, let’s face it: you’re going to keep acquiring more projects. I recommend covering your tank with a tarp to keep your wire and rebar from rusting when they’re not in use. That way all you have to do is wire up your latest acquisition and connect the battery charger.
You don’t need to dump the water out of your tank every time, or ever, really. However, if you need to impress someone and don’t want a bucket of sludge on your porch, you should carefully dump your tank out on a patch of dirt/sand/gravel and not your lawn. Don’t dump it into the storm runoff drains either.
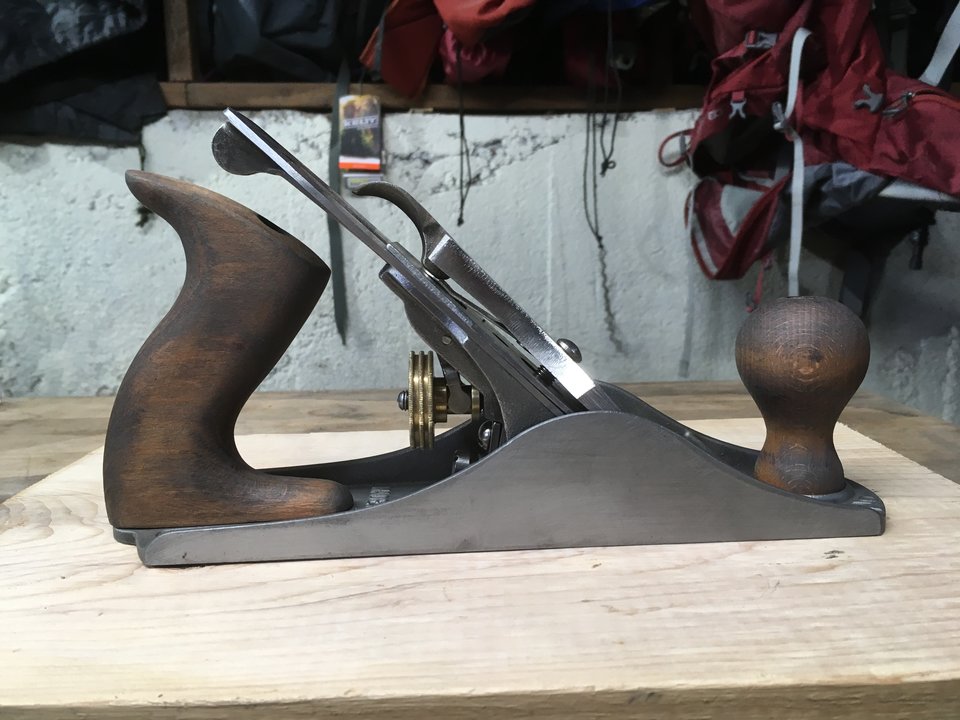
Examples
Here’s a Stanley #4 I recently cleaned up:
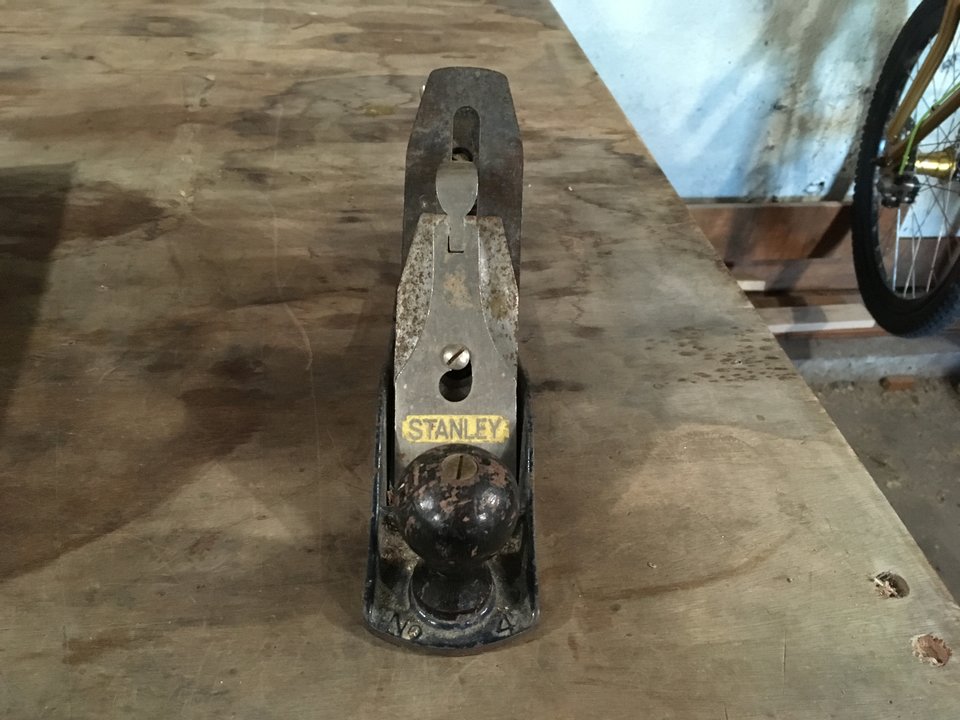
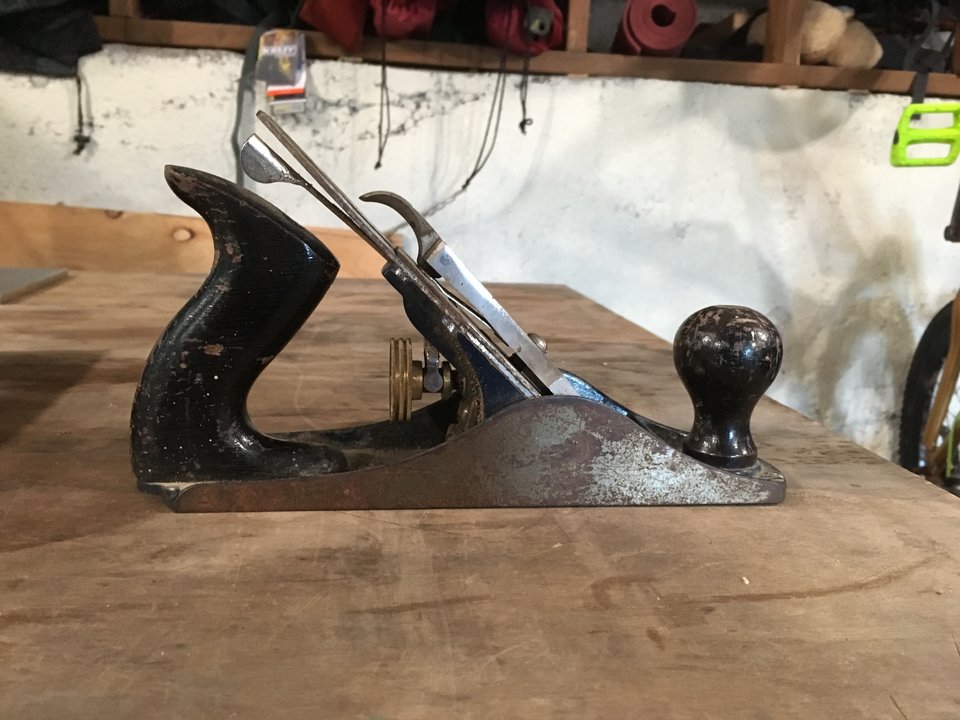
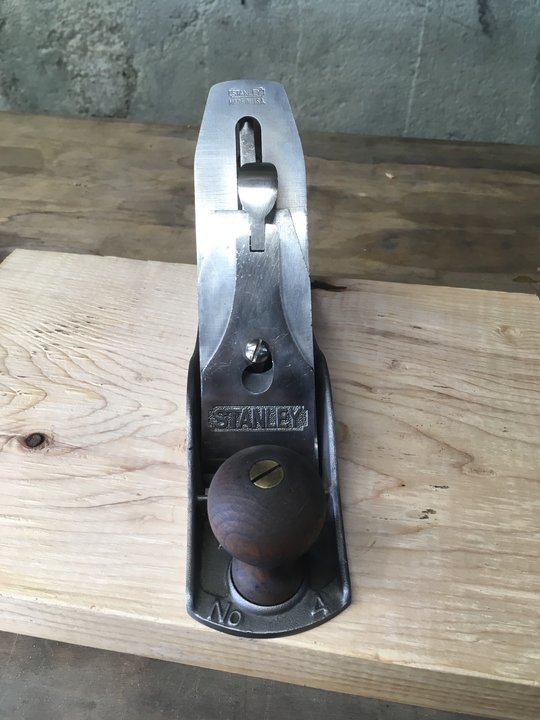
- Body
- Electrolysis tank for a few days, lots of scrubbing, sanding and flattening of side and sole on sandpaper and diamond stones. I used a coat of Autosol on the finish to prevent rust (hopefully). I tried a clear coat Rustoleum, but I am not good at spray painting, so I stripped it and started over.
- Little parts
- Vinegar bath and wire wheel polishing
- Blade
- Ground a new primary bevel, sharpened to 1200 grit on diamond stone + leather strop
- Brass parts
- Barkeeper’s Friend, scrubbing, wire wheel
- Wood parts
- Sanding from 60 grit to 220 grit. Could have done more, but I don’t care enough too, since this is just a plane for me to use. I did a couple coats of boiled linseed oil for finish too.